
Admin
April 14, 2026
Learning how to do polished plaster
is not just about applying a decorative coating; it is about mastering a
traditional finishing technique that transforms plain walls into smooth,
stone-like surfaces with depth, texture, and elegance. Polished plastering
is widely used in modern interior design because it offers a luxury finish
similar to marble or natural stone without the cost or weight of real
materials.
Unlike standard paint, a
polished plaster finish
is built in layers, carefully applied and compressed to create a durable,
seamless surface. This guide walks through each stage in detail so you can
understand exactly how professionals achieve high-end results.
Polished plastering
refers to the process of applying multiple thin layers of lime-based plaster
mixed with marble dust or fine aggregates. These layers are then smoothed,
compressed, and polished to create a reflective or satin-like surface.
It is often used to
create:
●
Marble-effect walls
●
Luxury feature surfaces
●
Seamless decorative finishes
●
Textured modern interiors
Because of its
flexibility, it can be used in both traditional and contemporary design styles.
Before starting,
preparation is key. Having the right tools ensures a smoother application
process and a more consistent polished plaster finish.
●
Lime-based plaster or Venetian
plaster mix
●
Clean water for mixing
●
Primer or bonding agent
●
Wax or protective sealant
●
Stainless steel trowels (various
sizes)
●
Spatulas
●
Mixing bucket
●
Sandpaper (fine grit)
●
Clean cloths for wiping
●
Masking tape
●
Drop sheets or protective
coverings
●
Gloves and protective eyewear
A successful polished plastering
job begins with proper wall preparation. Any imperfections will show through
the final finish, so this stage is critical.
Start by:
●
Cleaning the wall thoroughly to
remove dust, grease, or loose paint
●
Filling cracks or holes using
suitable filler
●
Sanding the surface until smooth
and even
●
Applying a primer or bonding agent
for better adhesion
The wall must be dry,
stable, and clean before moving forward.
The consistency of your
plaster plays a major role in achieving a smooth polished plaster finish.
●
Follow manufacturer instructions
carefully
●
Mix small batches to prevent
drying out
●
Aim for a creamy, smooth
consistency
●
Avoid lumps or overly thick
mixtures
Proper mixing ensures
easier application and better control during layering.
The first coat forms the
foundation of the entire system.
●
Apply a thin, even layer using a
stainless steel trowel
●
Work in smooth, overlapping
strokes
●
Avoid leaving ridges or thick
patches
●
Allow the coat to dry completely
before continuing
This layer does not need
to look perfect; its purpose is to create a strong base for subsequent coats.
The second layer is
where the surface begins to develop depth and texture.
●
Apply plaster in irregular, thin
strokes
●
Use different trowel angles to
create variation
●
Smooth out sharp edges while still
wet
●
Allow partial drying before
finishing touches
This stage is essential
in achieving the natural movement seen in a high-quality polished plaster wall.
The final layer is the
most important step in polished
plastering, as it defines the overall appearance.
●
Apply very thin coats in small
sections
●
Use random, overlapping patterns
●
Blend edges carefully to avoid
visible lines
●
Work quickly but evenly to
maintain consistency
At this point, the
surface begins to take on its characteristic depth and stone-like effect.
This is the step that
transforms plaster into a polished finish.
●
Use a clean stainless steel trowel
●
Apply firm, controlled pressure
●
Polish in circular or sweeping
motions
●
Repeat until a smooth, reflective
surface develops
The more you compress
the surface, the more natural shine and depth you will achieve in the polished plaster finish.
Once the surface is
fully dry, sealing protects and enhances the finish.
●
Apply natural wax or specialist sealant
●
Buff gently using a soft cloth
●
Ensure even coverage across the
entire wall
●
Allow curing time for maximum
durability
Sealing not only
protects the surface but also enhances its colour richness and sheen.
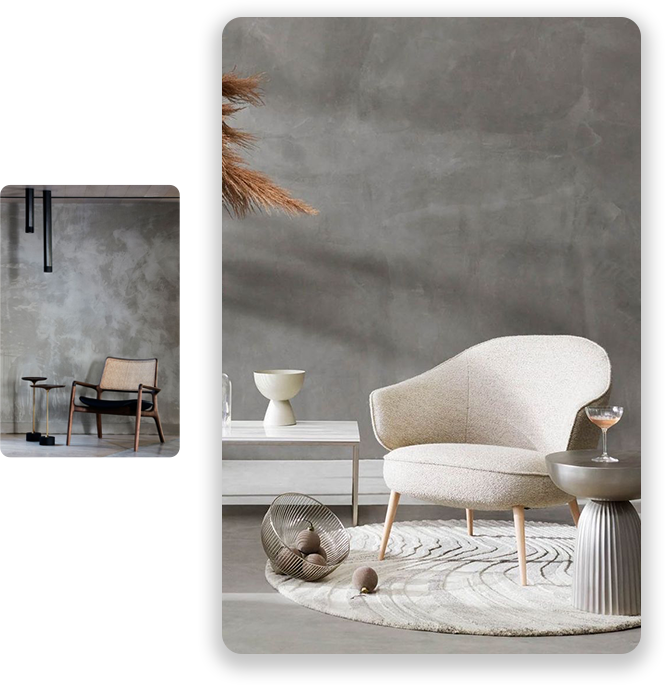
A soft, natural look
with minimal shine. Ideal for modern minimalist interiors.
A subtle reflective
surface that balances softness with elegance.
A highly reflective,
marble-like surface often used in luxury interiors and statement feature walls.
A polished plaster wall
works well in a variety of spaces, including:
●
Living room feature walls
●
Hotel lobbies and reception areas
●
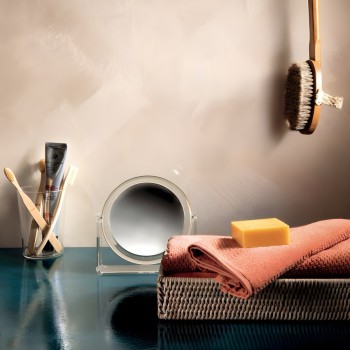
Luxury bathrooms and spa interiors
●
Restaurants and retail spaces
Its seamless appearance
makes it especially effective in high-end environments.
Poor preparation leads
to cracks, uneven texture, and weak adhesion.
Thick applications
prevent proper drying and reduce durability.
Each layer must dry
properly before the next is applied.
Excess pressure can
damage the surface and create uneven shine.
To keep your polished plaster finish
in excellent condition:
●
Clean gently with a soft damp
cloth
●
Avoid abrasive cleaning products
●
Reapply wax periodically for
protection
●
Prevent heavy impact or scratching
With proper care,
polished plaster can last for many years while maintaining its original beauty.
Understanding how to do polished plaster
gives you insight into one of the most refined decorative wall techniques in
interior design. Through careful preparation, precise application, and
controlled polishing, you can create a durable, elegant, and timeless surface.
Whether you are working
on a single feature wall or an entire room, polished plastering offers a luxurious finish
that elevates any interior space with natural depth and sophistication.